Follow these steps to export your vault from Bitwarden, and import into VaultWarden.
Note: This tutorial explains how to export from Bitwarden’s web browser extension, to your account in ADRA’s VaultWarden, security.adra.cloud. Instructions will be similar but will appear differently to the below screenshots if you are exporting/importing from a url to a browser extension.
Export from Bitwarden
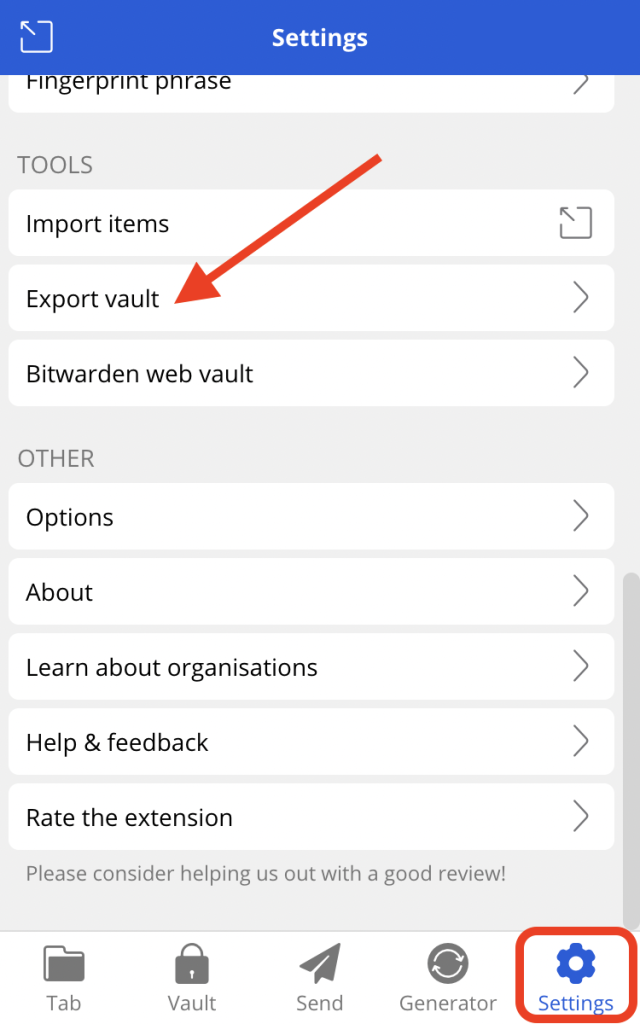
1. Open your Bitwarden browser extension. If you’re not logged in already, do so. Click on ‘Settings‘ in the bottom right corner. Scroll down and click on ‘Export Vault‘.
2. Choose the file format you want to export. .json or .csv are fine. Enter your Master password and click on ‘Submit‘.

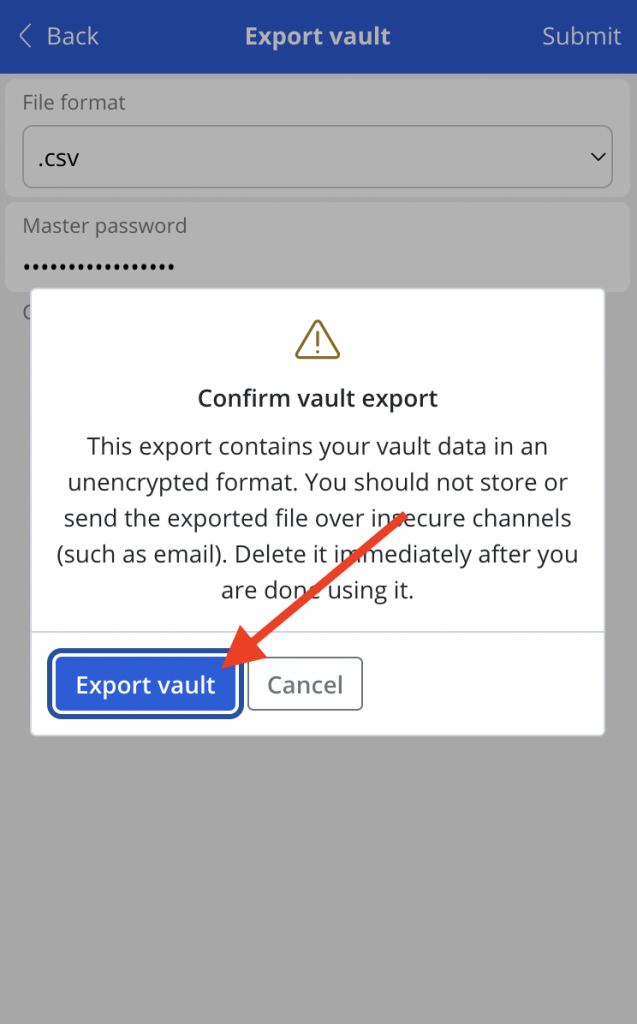
3. Confirm you want to export your vault by clicking ‘Export vault‘.
4. A file containing your vault will be automatically downloaded to your computer. You don’t need to change the file name if you don’t wish to.
Import into VaultWarden
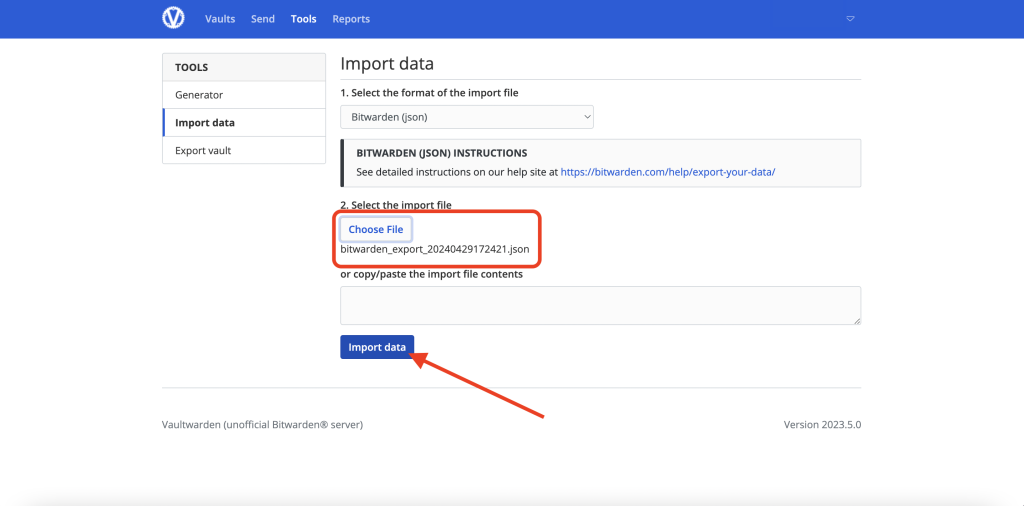
1. Go to security.adra.cloud and log into your account. Click on ‘Tools‘ in the top menu. Select ‘Import Data‘ from the left hand menu. Then select the file format you want to import. In this case choose, Bitwarden (json) or Bitwarden (csv) depending what you chose to export.

2. Choose the file from your computer that you just exported. Then click ‘Import data‘.
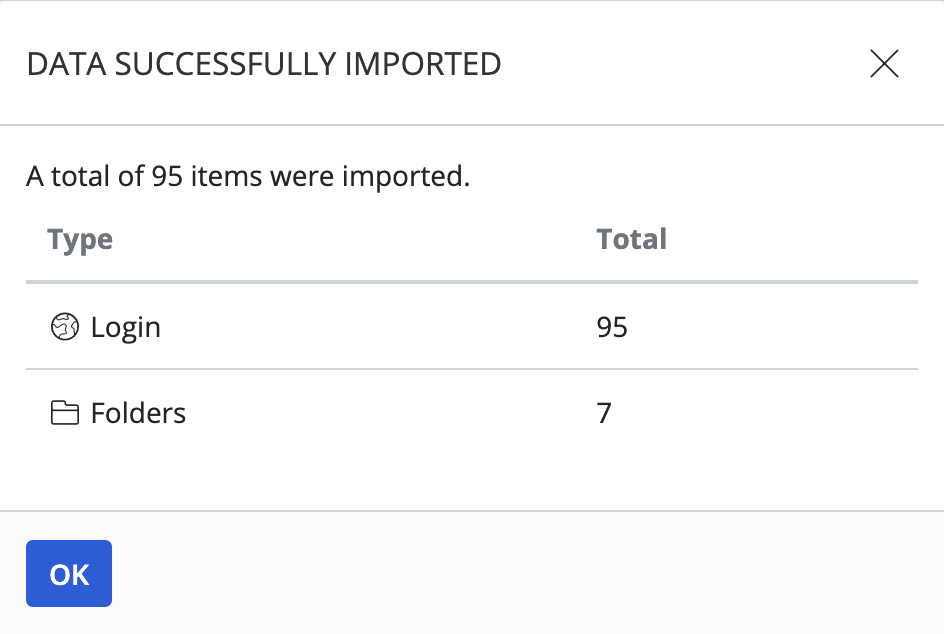
3. Your vault will start importing into VaultWarden. Once complete, there will be a popup saying the data has been successfully imported. Click on ‘Ok’ to exit.
4. You can now delete the file you exported to your computer. This is advisable to keep your information secure.
If you are already using the Bitwarden web browser extension, you will need to add your ADRA VaultWarden account to use it, follow this tutorial for instructions.
If you haven’t installed the Bitwarden web browser extension or mobile application yet, follow this tutorial for instructions.
If you have any questions or concerns related to this process, reach out to our ADRA Source Support team to raise a ticket.