2025 Budgeting Tool
This year ADRA International is using a Power App accessible through Microsoft Teams to help facilitate the 2025 budgeting.
The 2025 budgeting year will be based on “zero budgeting” meaning you should try as much as possible to not look at 2024’s budget & actuals as a starting point but rather assess what your cost center’s core requirements are. The Vice Presidents (VP’s) and the Finance team have worked on Budget allocations, and they (the VP’s) will allocate budgets to the Cost Centers they are responsible for.
The Cost Center owners will be able to access the tool through Microsoft Teams and manage your Account allocations for all the Cost Centers you are responsible for, Request new Account codes, Staff.
Watch the video below for a step through of the 2025 Budgeting Tool, or follow the step by step instructions below.
Step 1: Accessing "Budgets"
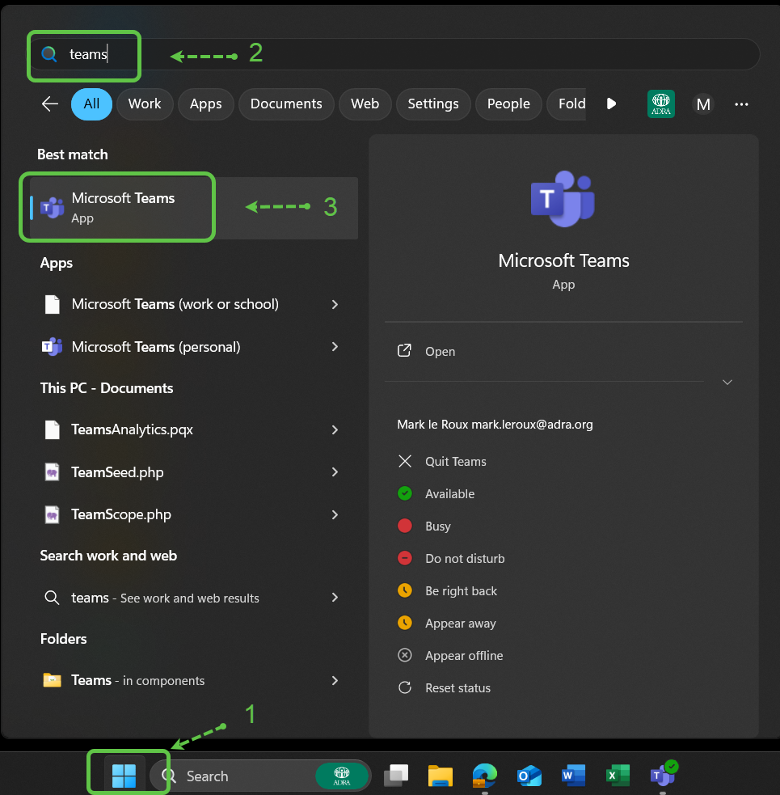
To access the Budgeting tool you can open Teams:
- Click the Microsoft icon at the bottom of your screen to open the Windows Search bar
- Type “Teams” in the search bar, and you should see Teams appear in the list of results
- Click “Microsoft Teams App” to open Teams.
Once Microsoft Teams has opened, you will be able to open the application.
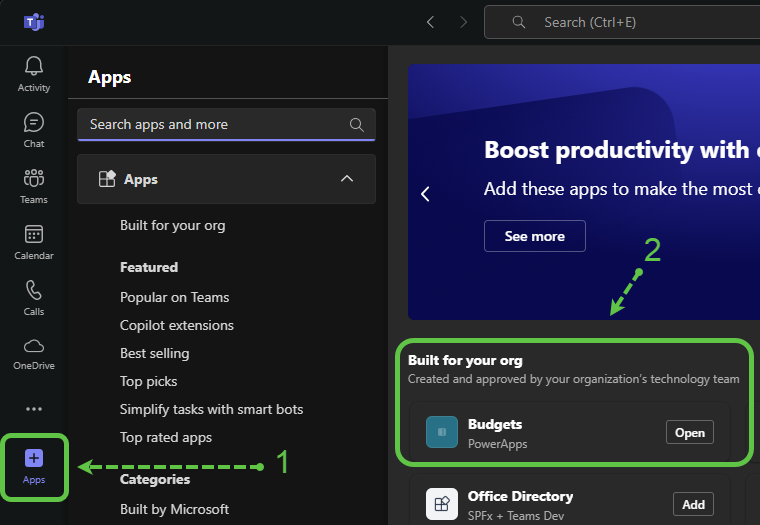
- Click the “Apps” menu option on the left hand side. A list of applications will show on the right.
- Under the section “Built for your org” you will find the “Budgets (PowerApps)”, you can click and open the app.
- When opening the application for the first time you will be given a list of modules the application might access that you need to agree too before the application will run.
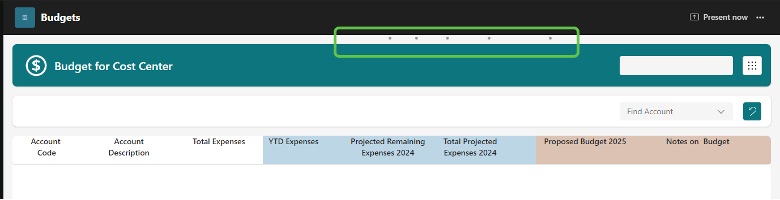
The Budgets application will show a loading screen.

Once the Budgets application has loaded you might not see the details of your budgets immediately; but you will be able to see from at the top of the application that the data is loading.
Step 2: Navigating around the Budget app
Once your data has loaded you will see the accounts related to the selected Cost Center. This is a description of the various options within the application.
- All the “Cost Centers” that you have access to will be visible here, you can change the cost center you are working on by clicking the down arrow and selecting the cost center you want to work on.
- This is the root menu option which will be covered next.
- Your “Account Categories” will be listed as tabs across the top, note that not all Cost Centers have the same categories so this could differ based on the selected cost center.
- You can within the selected Account Category filter the account using the “Find Account”.
- If you want to clear your Account filter click the undo arrow to the right of the filter.

The total for the selected Account Type and your overall Cost Center will be displayed at the bottom of the application screen; note that the Remaining and Available totals are calculated based on what your VP has allocated to that Cost Center.

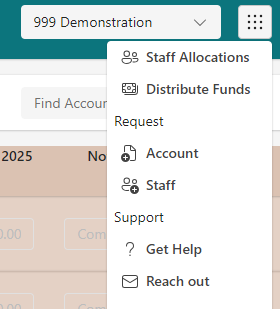
You can use the navigation menu to move to different parts of the application
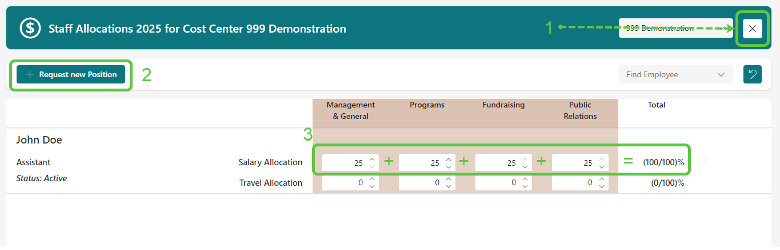
- Staff Allocations – each cost center owner will need to allocate the percentage breakdown of Salary and Travel between Management & General, Programs, Fundraising and Public Relations.
- Distribute Funds – This feature is only available to VP’s and is where they can distribute their funds between the cost centers they are responsible for.
- Request
- Account – If you need a new account to budget and monitor your finances in more detail you can request account codes; these will be reviewed and approved by the finance team.
- Staff – if more staff resources are required you will make the request here.
- Support
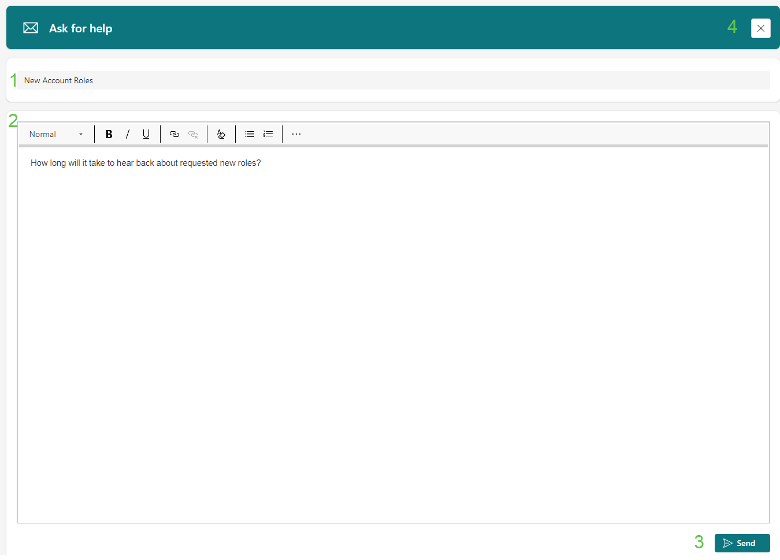
- Get Help – This is a quick and easy way to access the documentation.
- Reach out – If you are still stuck, you can submit a request for help.
Step 3: Reviewing and updating your Cost Center budget
The main reason for this application is to set the 2025 budget for all the Accounts within your Cost Center.
You will have your Account Types at the top as tabs; the accounts within the selected Account Type in the table below. NOTE: the Finance and HR teams will update your “Personnel and Related Costs”.
There are three main parts to the accounts table.
- The first is the white section where you can see the Code, Description, and the 2023 Expense (Actual – last fully reported year).
- The second section that is shaded in blue which is 2024’s Year To Date (YTD), if it is helpful you can enter what you still expect to spend for the remainder of 2024 to get and indication of what your full 2024 actual will look like. Please note this is not required as part of the 2025 budgeting and has been included as a helper.
- The third section is what is required for the 2025 budgeting process; you can enter the forecasted spend for 2025, and ideally also record a comment that will help you recall how you came up with that estimate, though this is primarily for your reference it can be helpful to your VP and the Finance team to understand what the figure is covering.

Account details
- 2024 Section: because the financial year hasn’t completed yet we can only give you a Year To Date (YTD) which is as of July 2024 (1); you can enter your projected remaining expenses for 2024 (2) which will be added together to give you an estimate of your 2024 expenses.
- The comment icon to record information about the projections.
- Enter your 2025 budget.
- Adding comments around why, what and how you calculated your 2025 can be useful for yourself, VP and Finance team.
- You will be able to see the history of changes made to the 2025 budget; if it is grey it means no changes have been made to that line

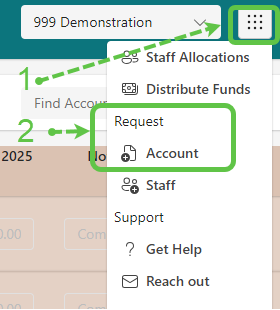
Step 4: Requesting New Accounts
If you need or want to add more accounts to your cost center which will allow you to record your actuals in more detail.
- Click on the top right menu icon so to see your options.
- Click the “Account” under the Request section.
You are now able to request an additional account. NOTE: this is a multi-step process, firstly you will request the new account, and secondly someone within the finance team will review approve and create the new account in ADRA International’s chart of accounts.
- Select the Account Category
- Enter the account description.
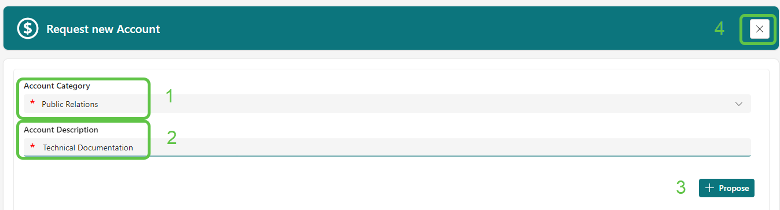
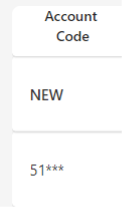
The account you just requested will now display and it’s Account Code will be set to “NEW”.
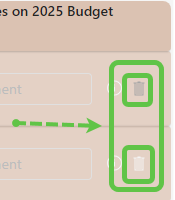
You will also be allowed to delete any accounts that you added accidentally by clicking on the trash bin at the right of the account line. If they trash bin is disabled (grey) it means the account has been created already.
Step 5: Allocation of Staff roles
One section of your budget is related to Staff and how their expenses are split across Management & General, Programs, Fundraising, and Public Relations. This is a percentage estimate and the total of the four groups should total 100%. NOTE: the system will not allow you to go over 100 allocation.
- Close this screen and go back to the main budgeting screen.
- Shortcut to requesting new positions
The sum of all the values must total 100%
Step 6: Requesting New Positions (Staff)
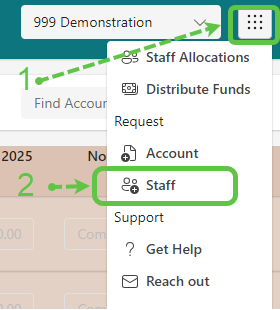
If your department requires additional roles you can submit your request in two ways; the first is through the main menu (1) and then selecting Staff (2) under the Request section.
The second is in the shortcut button “+ Request new Position” on the Staff Allocation screen.
When requesting a new staff member (position) you will use the following screen. NOTE: at this stage you are adding the position title, this position will be reviewed and approved at which point you will be able to complete the staff member details.
- Enter the Position name and click the “+Add” button
- You can close the screen by clicking the X button at the top right.

Your positions can have three statuses Employed, Requested and Approved.
- The count of positions in each of the statuses
- The total allocation (%) across all positions.

Help
FAQ (Frequently Asked Questions)
- Not seeing my data
- This could be because the data hasn’t loaded yet, this could be for multiple reasons, but the primary reason is your internet connectivity and secondary reasons are the number of Cost Centers and Accounts associated to your profile. You can usually tell if data is being loaded by looking at the top of the screen where you will see dots being animated.